Jamming with MongoDB and Netlify Netlify can support a MongoDB database — a tale in having your cake and eating it too
 Posted on by Stephen Cook
 You enter the realm of Jamstack and approach the Netlify Council. They spot the MongoDB requirement in your app, and a long and painful silence stretches out.
Will they allow this afront to Jamstack?
Fortunately, Netlify isn’t a one-trick pony, and it does allow integration with a database, like MongoDB.
FaunaDB Warning
Quick PSA: if you’re creating a database from scratch, not moving across an existing database, then you should seriously consider using FaunaDB instead. Netlify doesn’t have first-party support for MongoDB, so what we have to do in this guide is less secure.
Also — don’t take drugs, and stay in school. Now back to our regularly scheduled programming.
Getting Started with Netlify
First things first, you’ll need to get a basic build set up on Netlify. I would recommend following this guide and coming back here once you have a site being built and deployed.
Netlify Functions
We’ll be using Netlify Functions to let our site connect to our database. These are Lambda functions that run dynamically on the server, but we’ll write alongside the rest of our code.
First, let’s add a functions field to our netlify.toml (or create a netlify.toml if you haven’t already).
[build]
  # Directory with the serverless Lambda functions
  functions = "lambda_functions"
Great! Now let’s create a Lambda function, to see what’s what. Create a new
file called what_is_the_time.js in that folder:
// ./lambda_functions/what_is_the_time.js

// This `handler` is what is called when your Lambda
// function is triggered. For more full specs on it see
// https://docs.aws.amazon.com/lambda/latest/dg/nodejs-handler.html
module.exports.handler = async (event, context) => {
  const unixTime = Math.floor(Date.now() / 1000);
  return {
    statusCode: 200,
    body: `The Unix time is ${unixTime}`,
  };
};
Now, if we deploy this, we should be able to call this function by making a GET request to /.netlify/functions/what_is_the_time — and see what the time is:

Huzzah!
Dependencies with Netlify Functions
As much as it’s great to know what the time is, we eventually want to be able to access our MongoDB database. To do this, we want to access a MongoDB client — so let’s download that.
npm install mongodbWe can run this just from our project root, Netlify will make sure that our
Lambda functions get access to it properly. Note that in this guide I’m using mongodb@3.
Access Data from our Database
As I mentioned earlier in this guide, I assume you’ve already got a MongoDB database ready to go. If not, I highly recommend that you instead look at using FaunaDB on your Netlify site. FaunaDB has dedicated Netlify support, which MongoDB sadly does not have — meaning we have to do some less-than-perfect things to get things working with MongoDB.
So let’s create a new Lambda function to access our database. I’m going to
call mine pokemon.js since my database holds a collection of my favourite Pokémon. It’s a crucial database
and one that I desperately need access to through the web.
// ./lambda_functions/pokemon.js

const MongoClient = require("mongodb").MongoClient;

const MONGODB_URI = process.env.MONGODB_URI;
const DB_NAME = 'REPLACE_ME_WITH_YOUR_DB_NAME';

let cachedDb = null;

const connectToDatabase = async (uri) => {
  // we can cache the access to our database to speed things up a bit
  // (this is the only thing that is safe to cache here)
  if (cachedDb) return cachedDb;

  const client = await MongoClient.connect(uri, {
    useUnifiedTopology: true,
  });

  cachedDb = client.db(DB_NAME);

  return cachedDb;
};

const queryDatabase = async (db) => {
  const pokemon = await db.collection("pokemon").find({}).toArray();

  return {
    statusCode: 200,
    headers: {
      "Content-Type": "application/json",
    },
    body: JSON.stringify(pokemon),
  };
};

module.exports.handler = async (event, context) => {
  // otherwise the connection will never complete, since
  // we keep the DB connection alive
  context.callbackWaitsForEmptyEventLoop = false;

  const db = await connectToDatabase(MONGODB_URI);
  return queryDatabase(db);
};
Note that we reference a process.env.MONGODB_URI at the start. We can’t inline this URI in the code since it will include our DB
credentials.
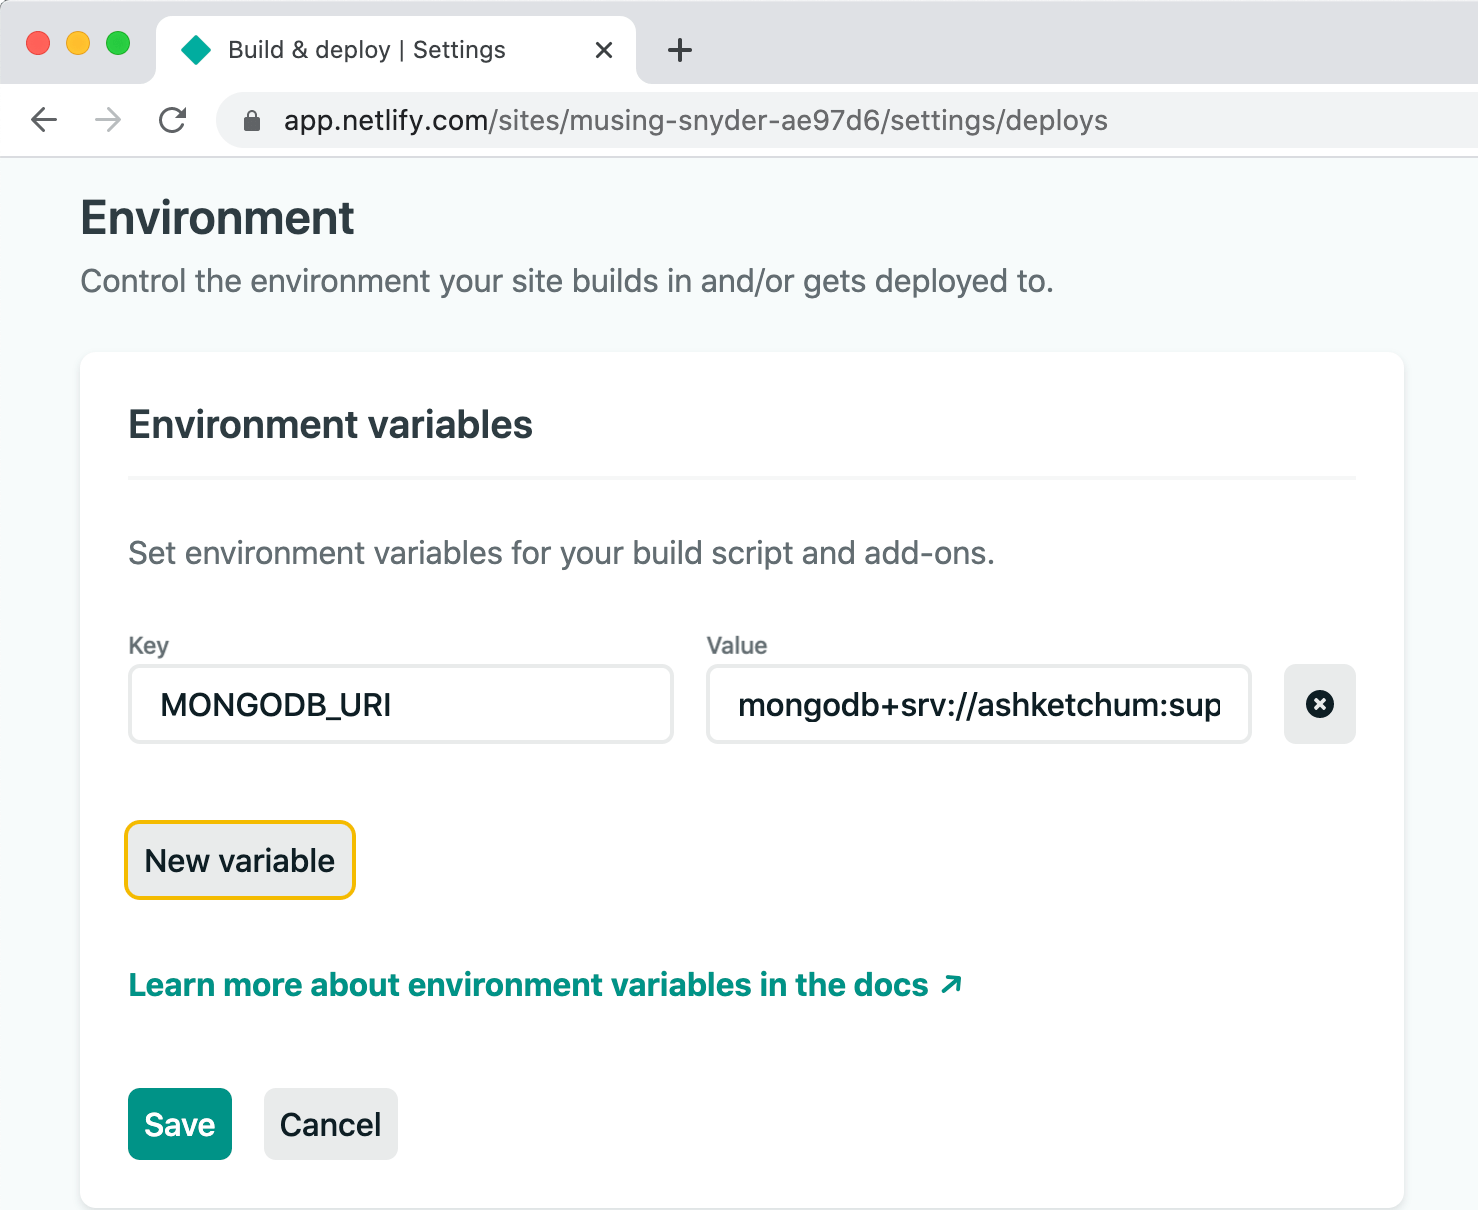
So first of all, let’s grab our MongoDB URI. You can follow this if you’re unsure what that is, but it should look something like this:
mongodb+srv://ashketchum:supersecurepassword123@cluster0-2cka2.mongodb.net/test?retryWrites=true&w=majorityAnd we’re going to put that into a Netlify build variable (which our Lambda function can access), and call it MONGODB_URI like so:

Whitelisting (Here Be Dragons)
So at this point, you may notice that making a GET request to /.netlify/functions/pokemon still doesn’t work. Unfortunately, MongoDB comes by default with whitelist protection,
meaning that it only allows specific IP ranges to access your database.
And unfortunately, our Lambda functions come from a variable IP range, we can’t safely say what the IP will be, so we can’t whitelist anything.
Usually, we would try and give our Lambda function a fixed IP, or create a Network Peering Connection — sadly Netlify doesn’t (at the time of writing this) support either of these things.
So instead, what Netlify recommend is that we open up our database to the entire internet.
What this means is that anyone — anywhere can access your database, if they know your password. So before doing this, please make sure that your password is secure, and that he database user has as few permissions as possible — I recommend creating a new user specifically for this.
It’s essential to get this right because you’re risking someone getting root privileges to your database and all of its data. Now would be an excellent time to get a colleague or friend to look over your shoulder!
Hopefully, I’ve done enough to impress the importance and danger of this — but making your database open to the internet will result in /.netlify/functions/pokemon returning the contents of our database!
Modify Data in our Database
So we’ve got access to our database now, but what if we want to modify data in it? How do we get data from our Lambda function?
Let’s modify our pokemon.js Lambda function to add a Pokémon when receiving a POST.
// ./lambda_functions/pokemon.js

const pushToDatabase = async (db, data) => {
  const pokemonData = {
    name: data.name,
    number: data.number,
  };

  if (pokemonData.name && pokemonData.number) {
    await db.collection("pokemon").insertMany([data]);
    return { statusCode: 201 };
  } else {
    return { statusCode: 422 };
  }
};

module.exports.handler = async (event, context) => {
  // otherwise the connection will never complete, since
  // we keep the DB connection alive
  context.callbackWaitsForEmptyEventLoop = false;

  const db = await connectToDatabase(MONGODB_URI);

  switch (event.httpMethod) {
    case "GET":
      return queryDatabase(db);
    case "POST":
      return pushToDatabase(db, JSON.parse(event.body));
    default:
      return { statusCode: 400 };
  }
};
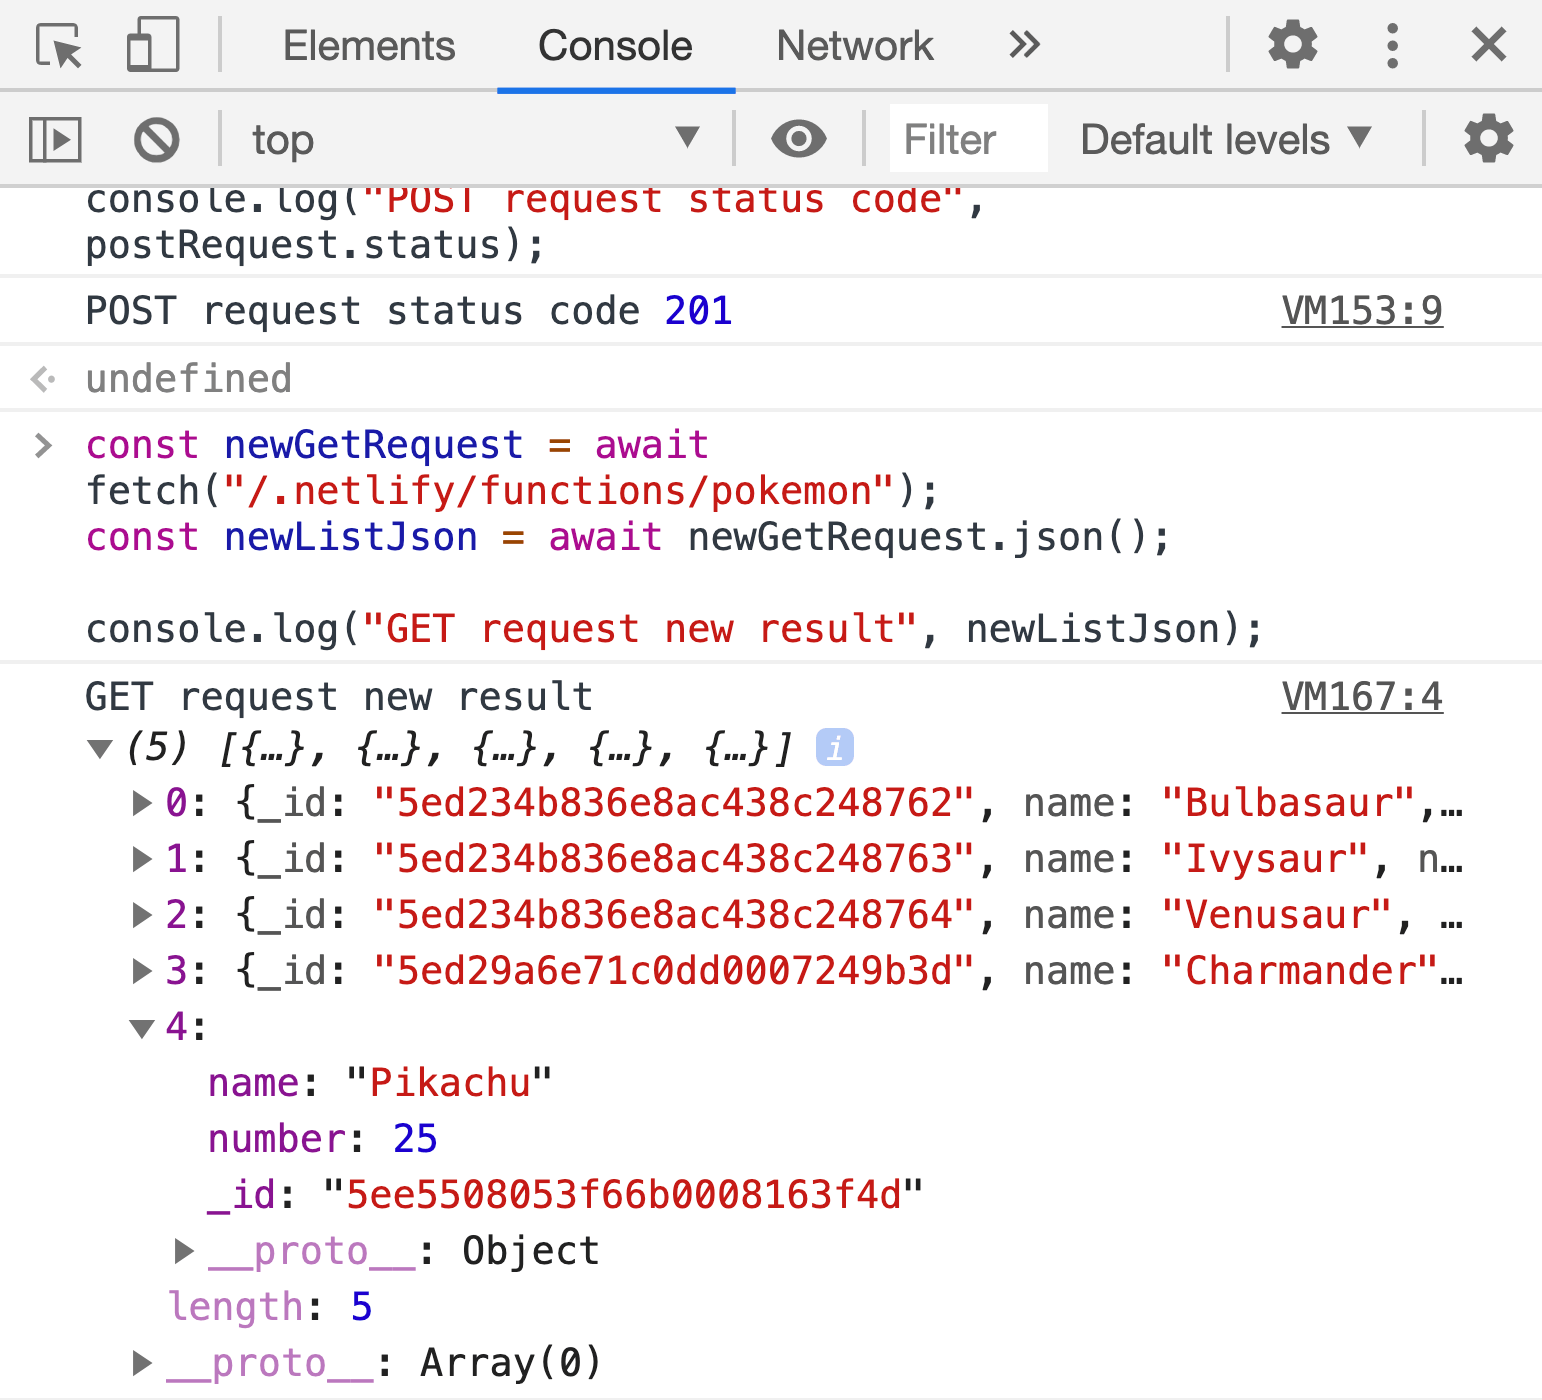
Now we can test this by making a quick POST request to our endpoint:
// test script

const postRequest = await fetch("/.netlify/functions/pokemon", {
  method: "POST",
  body: JSON.stringify({
    name: "Pikachu",
    number: 25,
  }),
});

console.log("POST request status code", postRequest.status);

const newGetRequest = await fetch("/.netlify/functions/pokemon");
const newListJson = await newGetRequest.json();

console.log("GET request new result", newListJson);
Huzzah!
Summary
You should now know how to:
- Create a Netlify Lambda Function
- Hook up your Netlify Lambda to your MongoDB database
- Create a MongoDB query Lambda
- Create a MongoDB modification Lambda
But you can also use this example GitHub repo for reference.